Access
After you log into the NMS Match System, you can access your interviews from the Interviews option in the menu.
Manage Interviews
-
Start with Settings
Access Settings using the link in the top left corner of the Interviews page.
Time Zone
Programs attending CRIP should set their timezone as Cental Time. Programs not attending CRIP should select the timezone where the interview will be conducted.
- Select the Edit button
- Choose the time zone where you will conduct the interview (e.g., Central Time if you are attending CRIP)
- Select the Save button
Candidates will see your available interview times in their local time zone, as well as the time zone you specify.
Interview Types
You must specify at least one Interview Type for your program. If you intend to have only one kind of interview with each candidate, you only need to have one Interview Type (e.g., Program Interview, or Interview Day).
Programs that will want their interview candidates to schedule themselves into more than one kind of interview (e.g., initial one-on-one interview, callback interview, group reception), or want to interview different groups of applicants separately (e.g., PMSR/RRA separate from PMSR), must create different Interview Types for each of those kinds of interviews. The Interview Type name is shown to candidates.
The system allows each candidate to book only one interview of each Type offered by a program.
Interview Types can be added, edited, or removed as required.
Daily Digest Email
By default, your program will receive a daily digest email that provides a summary of all changes that have occurred to your interview schedule in the last 24 hours - including new bookings, changed bookings, and cancellations. The email is sent once per day only if changes have occurred. If you have set up any secondary users for your program, they will receive a copy of the email as well.
If you want to stop receiving the daily digest email, choose Off.
-
Add Interview Event
An Interview Event consists of a specified Interview Type offered at a specified date and time.
To create Interview Events, select the + Add New Event link located on the top right corner of the interview page displayed under the Events tab or the Calendar tab.
- Create an Event Title (e.g., Interview). The title can be the same as the Interview Type, or you can customize the title for each Event you create. The title is shown to candidates.
- Select the Interview Type for the Event.
- Specify the Event Start Time and End Time. The start time and end time are created in your specified time zone.
- Select the date(s) for the Interview Event. If the Interview Event will be offered at the same time on multiple dates, you can select more than one date.
- Select the number of slots available to book, or number of candidates that can attend the Event simultaneously. For example, if you are having an interview where 3 different candidates can attend the same Event (e.g., a panel interview or an Event where candidates rotate to different interviewers), select 3.
- Optional: Specify the Event location of the interview, or provide a link to a video conference, if known. You can add the location or video conference link at a later time.
- Optional: Upload a PDF of instructions that you would like to provide to candidates. Candidates will be able to review this document as part of event details on the interview scheduling page.
- Optional: Select a Lockout Date for the event. The lockout date is the date when no further bookings, changes, or cancellations can be made to the event by applicants. The default lockout date for programs attending CRIP is January 4, 2024. Applicants who want to make changes to an interview event on or after the lockout date will need to contact the program directly.
-
Edit or Change an Interview Event
Calendar Tab
- Select the Interview Event
- Select the Edit button
Events Tab
- Select the Edit button next to the Interview Event
You can change the Event Title, Interview Type, Start and End Time, Dates, Location, or Instructional PDF.
When you make a change, you will be prompted to notify all scheduled candidates of the change. You are strongly encouraged to notify candidates of the change. Changing the time of a scheduled Event can create conflicts for candidates.
-
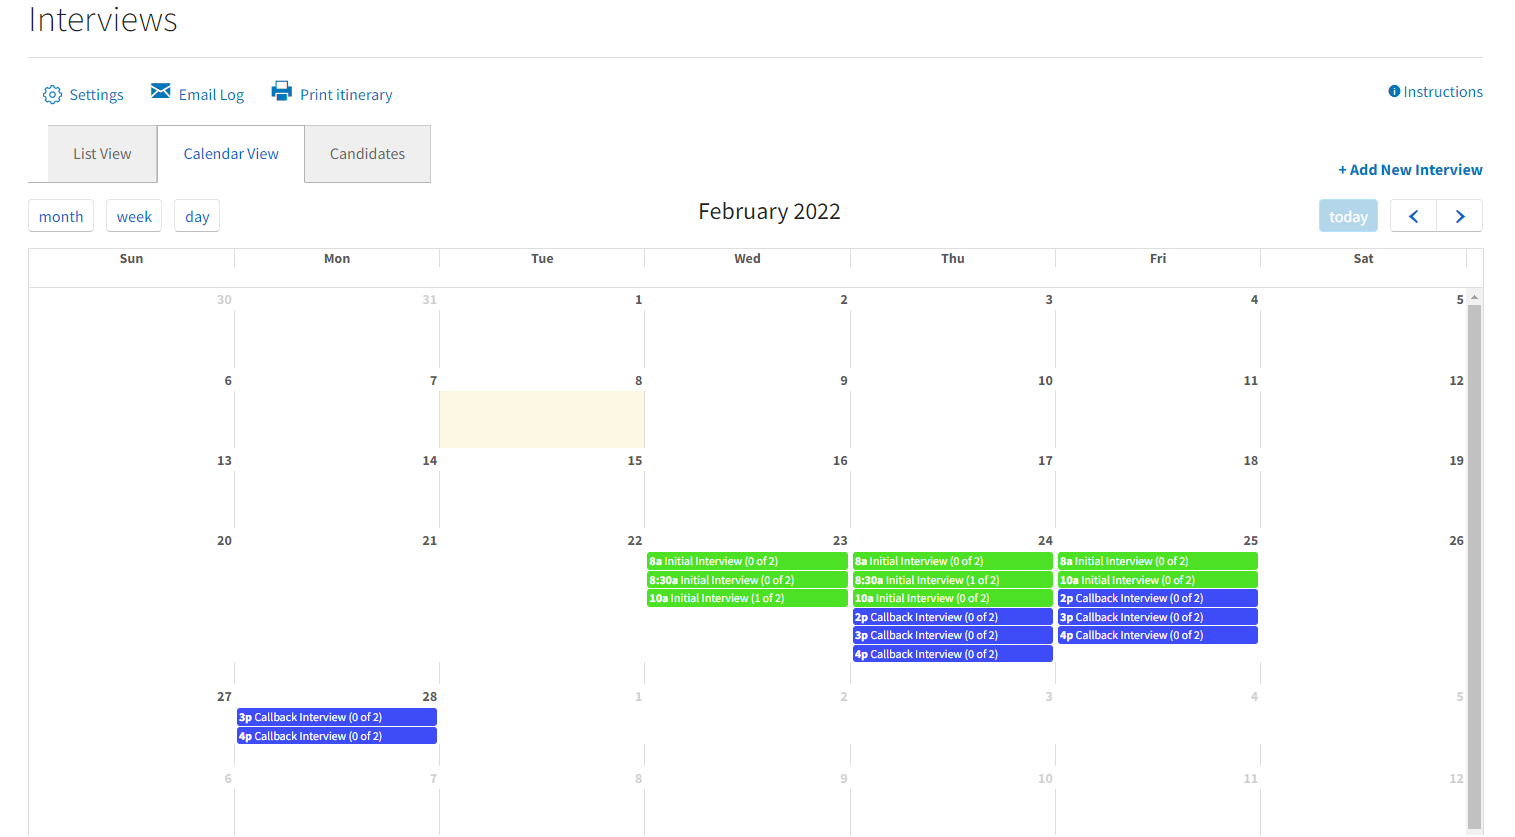
Delete Interview Event
Calendar Tab
- Select the Interview Event
- Select the Delete button
List Tab
- Select the Delete button next to the Interview Event
You can only delete Events that do not have any scheduled candidates. If the Event has scheduled candidates, you must cancel the interview for each scheduled candidate before deleting the Event.
-
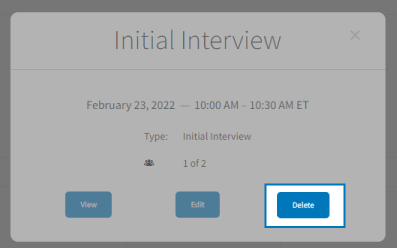
Print Itinerary
Interview itineraries show all scheduled interviews organized by date and time. To print your itinerary, select Print Itinerary located at the top of either the Events or Calendar Tabs.
Manage Candidates
-
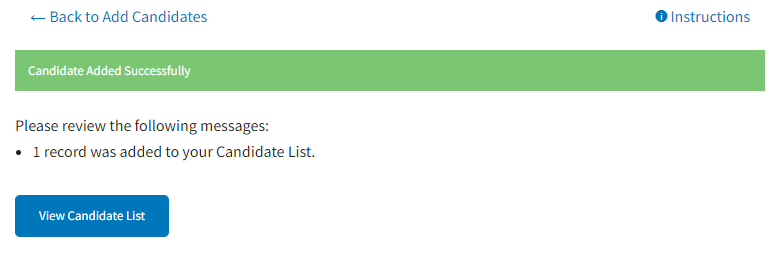
Add Candidates
Applicants who you invite to interview are referred to as Interview Candidates. Only applicants who have registered for CASPR can be added to your list of Interview Candidates. There are 3 ways to add applicants to your list of Interview Candidates.
From Your Applications
From the Applications page, change the Review Status of the applicant(s) to Selected for Interview. They will be added to your list of Interview Candidates.
Search and Add
- Select Interviews from the Menu
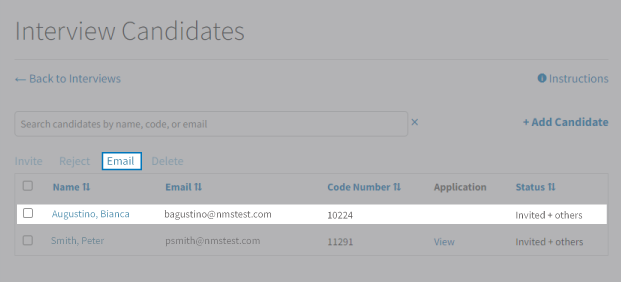
- Select the Candidates tab
- Select the + Add Candidate link at the top-right of the page
- Select Search and Add
- Start typing in the search box to find the candidate you want to add. Candidates can be searched by Match Code Number, last name or first name.
- Select the candidate you want to add from the search results
- Press the Add to List button to add the candidate to your list.

Only candidates who have registered for the Match can be added to your list of Candidates. If you search for a candidate and they do not appear in the list, it is because the candidate is not yet registered for the Match. Contact the candidate and encourage them to register for the Match as soon as possible so you can add them to your list of Candidates.
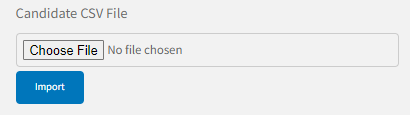
Add via a CSV File
You can add one or more candidates by importing a csv file of candidate information into the NMS Match System.
- Select the Candidates tab
- Select the + Add Candidate link at the top-right of the page
- Select Add Via CSV
- Select Choose File. The file you select must be in csv (comma-separated) format and end with a .csv extension (e.g., candidates.csv). Your file must comply with the following format:
Email, FirstName, LastName
sue@candidate.com, Sue, Salome
avery@candidate.com, Avery, Palur
The first record in the file must be a header that lists the column names as shown above. The first column must be the candidate's email address. The second column must be the candidate's first name. The third column must be the candidate's last name. Additional information (e.g., code number, school, etc.) can be listed starting in the fourth column, but will be ignored. - Select Import
You can upload a CSV file as many times as you like. The system will not delete or duplicate any candidate on your existing list. Only applicants who have registered for CASPR with the email address specified in the file will be added to your list of Interview Candidates.
-
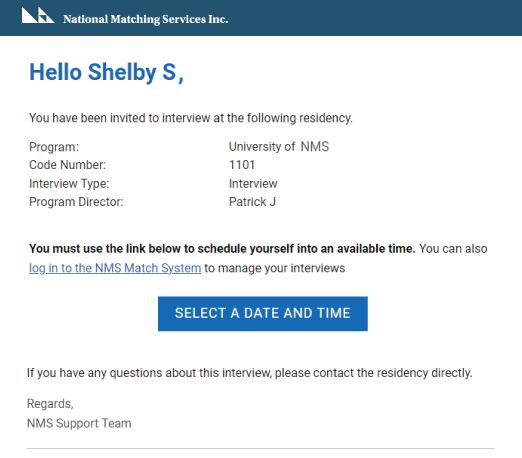
Invite a Candidate
- Select Interviews from the Menu
- Select the Candidates tab
- Select the checkbox next to the name(s) of the candidate(s) on your List of Candidates.
- Select the Invite link at the top of the list.
- If you have more than one Interview Type, you must select the Interview Type(s) to which you want to invite the candidate(s).
- Select Send

The Candidate(s) will be sent an interview invitation similar to the one below:
-
Delete a Candidate
- Select Interviews from the Menu
- Select the Candidates tab
- Select the checkbox next to the name(s) of the candidate(s) on your List of Candidates.
- Select the Delete link at the top of the list.
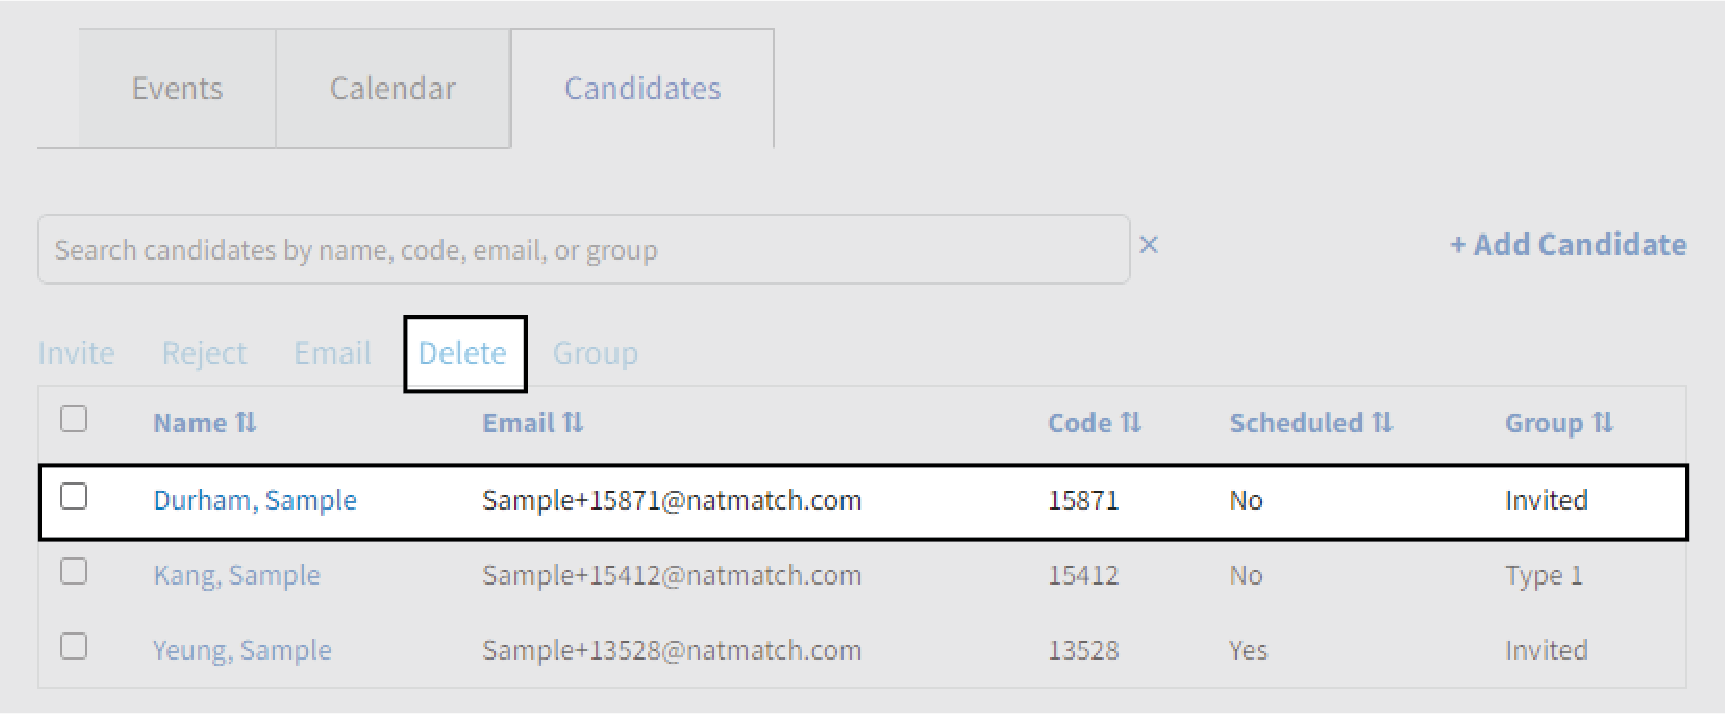
Candidates that are deleted are not notified that they have been removed from consideration. If you want to notify the candidate, use the Reject Candidates before deleting the candidate. You cannot delete a candidate if they have a scheduled interview with your program. You must cancel the scheduled interview for that candidate before deleting them.
-
Cancel Interview
- Select Interviews from the Menu
- Select the Candidates tab
- Select the link attached to the candidate's name in the list
- Select Cancel Interview button for each scheduled interview
-
Reject a Candidate
- Select the Candidates tab
- Select the checkbox next to the name of each candidate to be rejected
- Select the Reject link at the top of the list
- Select the Interview Type(s) for which the candidate(s) will be rejected
- Select the Reject button
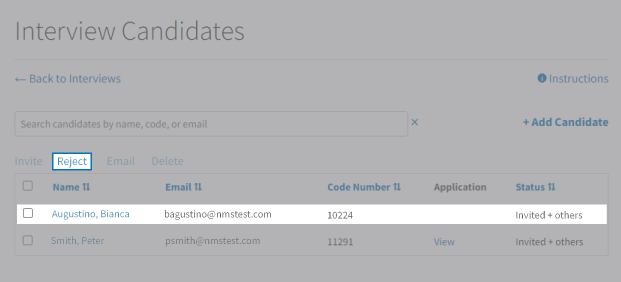
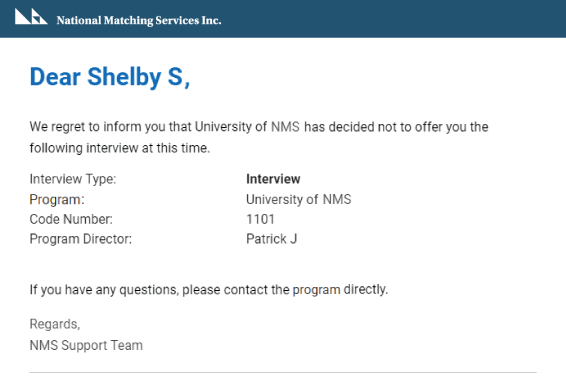
Candidates that are rejected are notified by email that they are no longer under consideration.
-
Email Candidates
- Select Interviews from the Menu
- Select the Candidates tab
- Select the checkbox next to the name(s) of the candidate(s) on your List of Candidates.
- Select the Email link at the top of the list.
Your default email client (e.g. Microsoft Outlook) will open with your email address in the "To:" field and the candidate email address(es) in the "Bcc:" field. You can then compose and send the email in your usual way. If your default email client does not open you may need to set up a default email client on your computer. Some helpful instructions are provided below, but contact your IT group if you need further assistance.
-
Manually Schedule a Candidate
To manually assign a candidate into an interview:
- Select Interviews from the Menu
- From the Calendar Tab or Events Tab, select View for the event in which you want to schedule the candidate
-
Select the Force Schedule A Candidate link

- Select the candidate that you want scheduled into that event
- Press Add
If you force schedule a candidate into an event that is full, the system will automatically increase the number of available slots to make room for the candidate. If the event is not full, the force-scheduled candidate will consume one of the available slots.
Candidates are not sent an email from the system notifying them when they have been force-scheduled into an event. You must notify the candidate separately.